How to Use a Tourniquet: Step-by-Step Guide
How to Use a Tourniquet: Step-by-Step Guide
A tourniquet can be the difference between life and death. When a limb suffers a severe traumatic injury — whether from a car accident, a workplace incident, or a violent encounter — uncontrolled bleeding can kill in as little as two to five minutes. Knowing how to apply a tourniquet correctly, and having one within reach, is one of the most critical preparedness skills any responsible adult can develop.
In this step-by-step guide, we'll cover everything you need to know: tourniquet types, how to apply one to yourself and others, common mistakes to avoid, where to carry it, and how it fits into a complete EDC medical kit. Whether you're new to preparedness or refining your skills, this guide is built to help you act confidently when every second counts.
If you're still choosing a tourniquet, check out our detailed breakdown of the best tourniquets for everyday carry — we compare top picks side by side so you can make an informed decision.
Why a Tourniquet Should Be Part of Every EDC Kit
Most people don't think about traumatic bleeding until they're face-to-face with it. By then, it's too late to learn. Severe hemorrhage — particularly from an arterial bleed in the arm or leg — can cause unconsciousness within minutes. Emergency medical services may be 10 to 20 minutes away in many areas. That gap is exactly where your preparation matters most.
Military medicine data is clear: during conflicts in Iraq and Afghanistan, widespread tourniquet use by soldiers and medics dramatically reduced preventable deaths from limb wounds. The lessons learned there have since shaped civilian emergency training, including the Stop the Bleed campaign, which teaches everyday people how to respond to catastrophic bleeding.
Adding a tourniquet to your everyday carry doesn't mean you're expecting the worst — it means you're prepared to handle it. Think of it the same way you think about carrying a flashlight or a pocket knife. It's a tool you hope you never need, but one you'll be glad to have.
Types of Tourniquets: What You Need to Know
Not all tourniquets perform the same way under pressure. Choosing the right one starts with understanding your options.
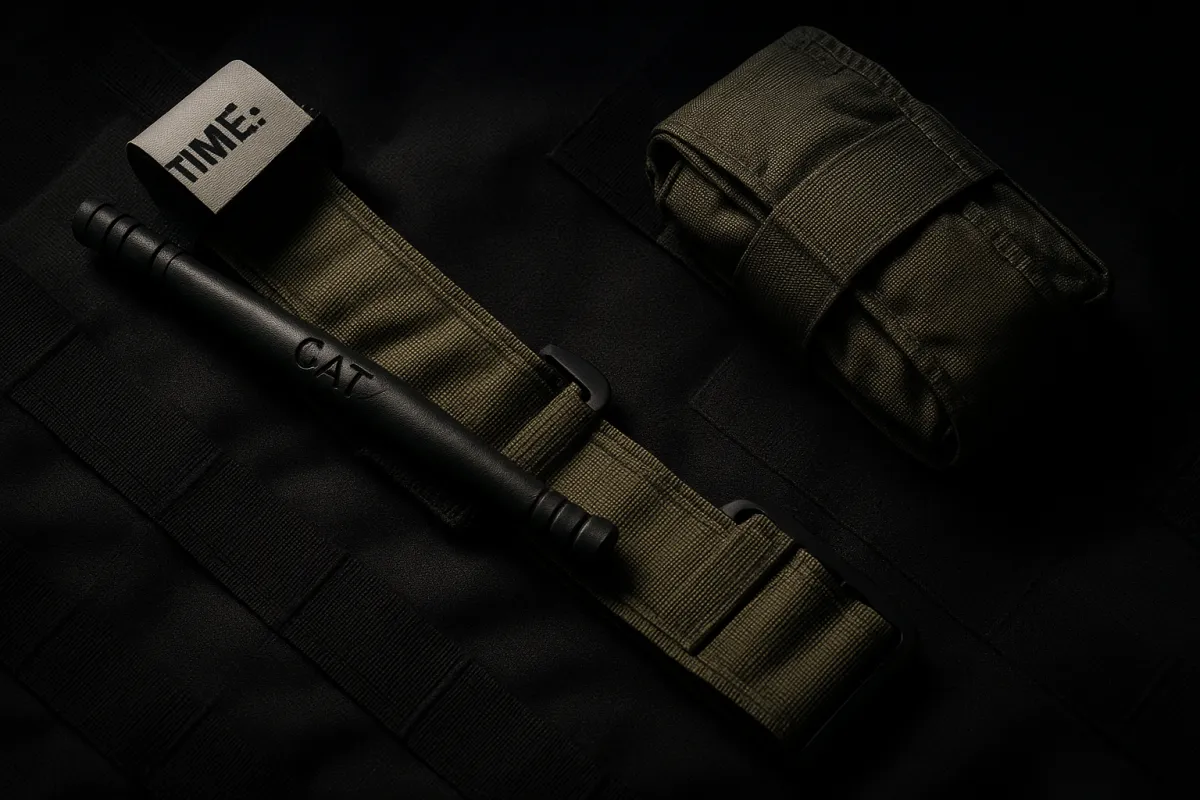
CAT (Combat Application Tourniquet)
The CAT is the gold standard — the most widely used tourniquet in military and law enforcement. It features a one-handed windlass system, a self-adhering band, and a time-marking tab. Designed for self-application with one hand under stress. Check Price on Amazon
SOFTT-W (Special Operations Forces Tactical Tourniquet Wide)
A trusted alternative with a wider strap for better pressure distribution and a tri-ring buckle for secure locking. Slightly more complex to apply but offers excellent mechanical advantage and a low-profile folded size. Check Price on Amazon
RATS (Rapid Application Tourniquet System)
A thin, elastic-band design that coils into a very small package — popular for minimalist EDC setups. Best used as a backup option or for smaller limbs. Check Price on Amazon
Bottom line: If you're carrying one tourniquet, make it a CAT or SOFTT-W. These are the designs medical professionals and military operators trust most when lives are on the line.

Step-by-Step: How to Apply a Tourniquet to Yourself
Self-application is one of the most important skills to practice. Here's the standard protocol for a windlass-style tourniquet (CAT or SOFTT-W):
Step 1: Identify the Bleed
Expose the wound immediately. If it's a limb bleed that is life-threatening — spurting blood, rapid pooling, or severe limb trauma — a tourniquet is the right tool. Tourniquets are for arms and legs only. Never apply one to the neck, chest, or abdomen.
Step 2: Position the Tourniquet
Slide the tourniquet up the limb and position it approximately 2 to 3 inches above the wound. Never place it directly over a joint (knee or elbow). If you can't identify the exact wound, apply it high and tight — as high on the limb as possible.
Step 3: Tighten the Band
Pull the self-adhering strap as tight as you physically can before locking it into the buckle. The tighter the band before you touch the windlass, the fewer turns you'll need to stop the bleed.
Step 4: Turn the Windlass
Rotate the windlass rod until the bleeding stops or you can no longer feel a pulse below the tourniquet. This will cause significant pain — that's normal and expected. Do not stop turning because it hurts. The pain means it's working.
Step 5: Lock and Mark the Time
Lock the windlass rod into the clip to prevent it from unwinding. Write the time of application on the tourniquet's time-marking tab, on the patient's skin, or both. Say the time out loud if others are present. EMS and trauma surgeons need this information.
Step 6: Call 911 and Wait
Keep the tourniquet in place — do not loosen or remove it under any circumstances in the field. Only trained medical personnel should remove a tourniquet after it has been applied.
Step-by-Step: How to Apply a Tourniquet to Someone Else
Applying to another person follows the same general steps, but you have both hands free and can better control the scene.
Call 911 first — or instruct a bystander to call while you work.
Apply direct pressure to the wound while you prepare the tourniquet.
Slide the tourniquet over the limb and position it 2 to 3 inches above the wound.
Pull the band tight, lock it into the buckle, and turn the windlass until bleeding stops.
Lock the windlass and mark the application time immediately.
Keep the patient calm and still until EMS arrives. Monitor their airway and consciousness.
Speed matters, but placement matters more. High and tight is always the right default when you're unsure of the wound location.

Common Tourniquet Mistakes to Avoid
Applying it too loose — A tourniquet that isn't tight enough slows venous flow but not arterial flow, making the bleeding worse. It must stop all blood flow below the application point.
Placing it over thick clothing — Apply directly to skin whenever possible. Heavy fabric prevents effective compression.
Placing it too close to the wound — Always stay 2 to 3 inches above. Directly over the wound reduces effectiveness.
Stopping because of pain — The patient will feel significant pain. This is expected. Don't stop tightening until the bleeding stops.
Removing it in the field — Never remove a tourniquet outside of a medical facility. Removal can trigger sudden blood loss and shock.
Not marking the time — Trauma surgeons need to know when it was applied. Write it down every single time.
Where to Carry Your Tourniquet for EDC
The best tourniquet is useless if you can't access it in under 10 seconds. Placement matters. Here are the most effective carry positions:
On your belt or thigh: A tourniquet mounted in a MOLLE pouch on your belt offers the fastest draw — ideal for high-risk environments or those who train frequently.
In your EDC backpack: For most people, an accessible front pocket in an EDC backpack is practical and low-profile.
In your vehicle: Your car is one of the most common locations for traumatic accidents. Keep a dedicated tourniquet in your vehicle EDC kit.
In your home kit: Place one in your home emergency supplies, accessible to every adult in the household.
For a complete picture of what to carry every day, see our Ultimate EDC Gear List for Men and our Ultimate EDC Gear List for Women — both include medical gear recommendations alongside core carry tools.
Tourniquet Training: Practice Until It's Automatic
Reading a guide is the beginning, not the end. Under stress, fine motor skills degrade and memory becomes unreliable. The only way to ensure you can apply a tourniquet under real conditions is to practice — repeatedly, with your actual gear.
Practice applying your tourniquet one-handed to yourself at least once a month.
Attend a Stop the Bleed course in your area — they're often free and take under two hours.
Practice in the dark, with gloves on, and with your non-dominant hand.
Time yourself. The goal is under 30 seconds for self-application.
Owning a tourniquet without training on it is still better than not having one — but training transforms it from a tool into a genuine life-saving skill.
Building a Complete EDC Medical Kit
A tourniquet handles one critical threat: limb hemorrhage. A complete EDC medical kit addresses a broader range of emergencies. Here's what to add alongside your tourniquet:
Hemostatic gauze (QuikClot or HemCon): For wounds where a tourniquet can't be applied, wound packing is the next best option. Check Price on Amazon
Pressure bandage (Israeli bandage): Controls bleeding from torso and head wounds quickly. Check Price on Amazon
Vented chest seals: For penetrating chest trauma — prevents tension pneumothorax. Check Price on Amazon
Nitrile gloves: Always protect yourself from bloodborne pathogens before assisting someone. Check Price on Amazon
Trauma shears: For quickly cutting away clothing to expose wounds. Check Amazon Price on Amazon
Compact IFAK pouch: Keep everything organized and accessible in a dedicated pouch. Check Price on Amazon
For more on building a preparedness kit from the ground up, check out our Beginner Emergency Preparedness Kit guide and our list of essential survival tools everyone should own.
Final Thoughts
A tourniquet is one of the highest-value items you can add to your preparedness system. It's small, lightweight, and capable of saving a life in the critical minutes before emergency services arrive. But it's only effective if you know how to use it — and if you have it within reach when it matters.
Start with a quality CAT or SOFTT-W, practice applying it until the steps are automatic, and build outward into a full EDC medical kit from there. When you're ready to choose your tourniquet, our guide to the best tourniquets for EDC will help you make the right call.
Preparedness isn't about fear — it's about confidence. And the confidence to act when someone's life depends on you is one of the most valuable things you can carry.